A U.S. passport photo can be rejected because of problems with size, head position, lighting, background, image quality, expression, clothing, or digital editing. The photo must also be recent and show your current appearance.
Review the nine mistakes below before attaching a paper photo or uploading a digital photo. An unacceptable photo can put the entire passport application on hold until you provide a replacement.
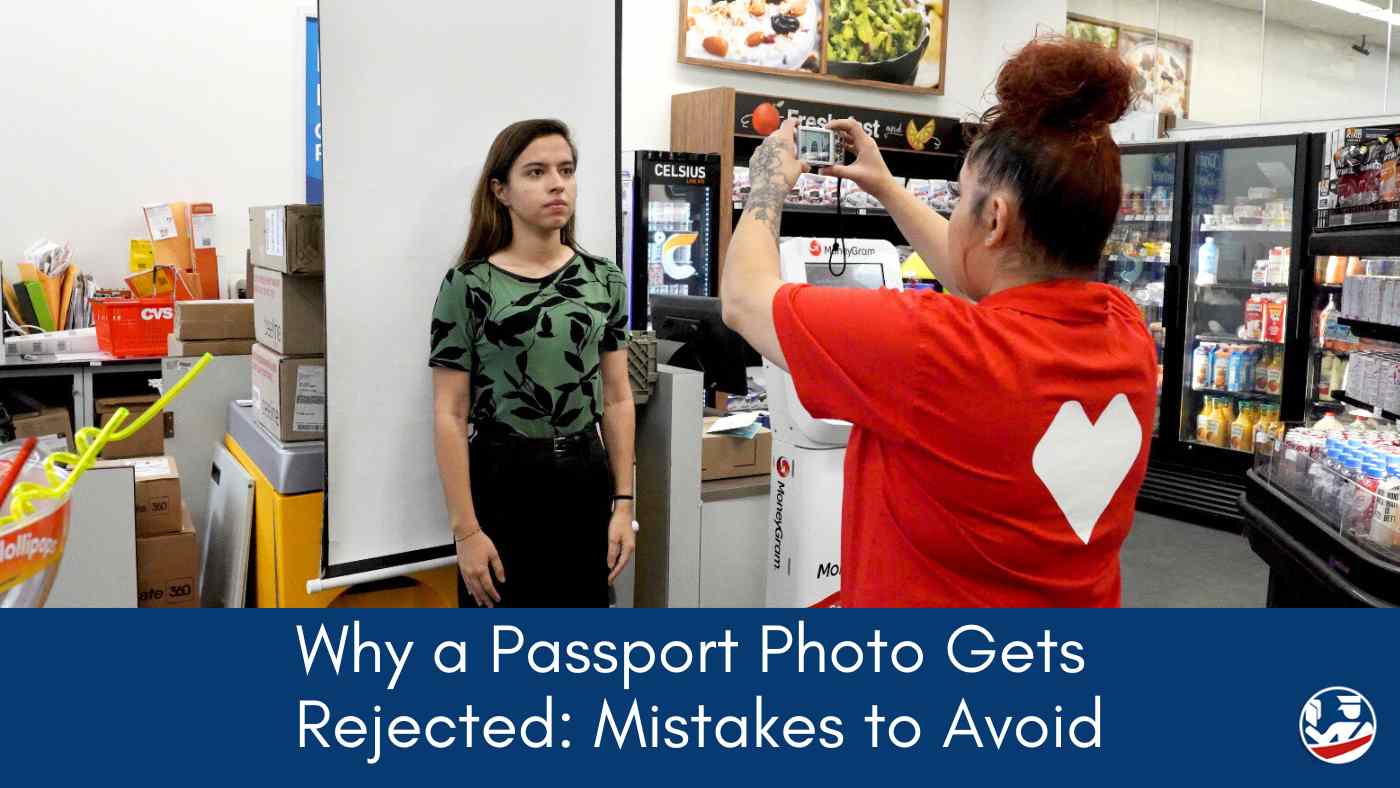
Quick Passport Photo Checklist
- Submit one color photo taken within the last six months.
- Use a plain white or off-white background with no shadows, texture, lines, or objects.
- Face the camera directly with your head centered, both eyes visible, and your mouth closed.
- Remove glasses, hats, face coverings, headphones, and wireless hands-free devices unless a documented exception applies.
- Use the original photo. Do not apply filters, replace the background, retouch the image, or use artificial intelligence.
- For a paper application, use a 2-by-2-inch photo printed on matte or glossy photo-quality paper.
See the complete U.S. passport photo requirements before submitting your application.
Table of Contents
- Incorrect photo size or head position
- Improper pose or facial expression
- Uneven lighting or shadows
- Poor focus, color, resolution, or print quality
- Glasses, hats, or anything covering the face
- Uniforms, camouflage, headphones, or similar items
- An unacceptable background
- Filters, retouching, AI, or other digital changes
- An outdated photo
- How to take a passport photo at home
- What to do if your photo is rejected
- Passport photo FAQs
1. Incorrect Photo Size or Head Position
A paper passport photo must measure 2 inches by 2 inches. The distance from the bottom of the chin to the top of the head must be between 1 inch and 1 3/8 inches. The head and shoulders should be centered, and the entire head must be visible.
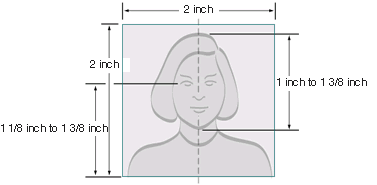
Photos are often rejected when the camera is too close, too far away, or positioned above or below the subject. Stand several feet from the camera and keep it level with the face. Do not stretch or compress an image to force it into the correct proportions.

The child faces the camera, and the head is centered.

The child is not facing the camera directly.
A cropping tool may help position a photo, but it cannot correct a bad camera angle, missing portion of the head, or distorted image. The Passport Photo Wizard can help size and crop a photo without changing the person’s appearance.
2. Improper Pose or Facial Expression
Face the camera directly with the head level and the shoulders square to the camera. Both eyes must be open and visible, and the mouth must be closed.
A natural closed-mouth smile may be accepted. The problem is not a slight smile by itself; it is an exaggerated expression, an open mouth, closed eyes, a tilted head, or a face turned away from the camera.

The subject faces forward with both eyes visible and the mouth closed.

The expression is exaggerated and does not meet the pose requirements.
3. Uneven Lighting or Shadows
The face must be evenly lit and shown in natural color. Shadows on the face or background, bright glare, overexposure, and underexposure can all make a photo unusable.
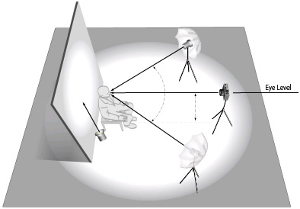
Avoid a single overhead light or a strong light placed far to one side. Use soft light from the front, and stand several feet away from the background so your body does not cast a shadow on the wall. Take a test photo and check the face, hairline, and wall before printing or uploading it.
4. Poor Focus, Color, Resolution, or Print Quality
The image must be sharp, high resolution, and in color. Do not submit a blurry, grainy, pixelated, washed-out, oversaturated, or black-and-white photo.
- Set the camera to its highest practical quality setting.
- Make sure the camera focuses on the face before taking the picture.
- Check that skin tones look natural and that the photo is not too dark or too bright.
- Print paper photos on matte or glossy photo-quality paper.
- Do not submit a photocopy, a scan of a printed photo, or a damaged print with creases, holes, smudges, or visible printer dots.

The image is clear, in color, and evenly exposed.

Passport photos must be submitted in color.

The color has been altered and no longer looks natural.
If you are not confident in the image or print quality, use a professional photo service. See where to get a passport photo taken or printed.
5. Glasses, Hats, or Anything Covering the Face
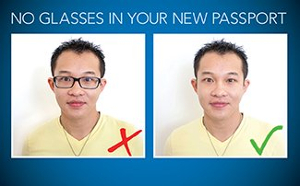
Remove prescription glasses, reading glasses, sunglasses, and tinted glasses. Do not rest them on top of your head. If you cannot remove glasses for medical reasons, include a signed statement from your doctor.
Hats and head coverings are not allowed unless worn for documented religious or medical reasons. When an exception applies, the full face must remain visible, and the covering cannot cast shadows or block facial features. Follow the State Department’s documentation instructions for the applicable exception.
Jewelry and facial piercings are allowed as long as they do not hide any part of the face or create a shadow. Hair must not cover the eyes or other facial features.

The full face is visible, and no glasses or accessories block it.

The subject is wearing glasses.
6. Uniforms, Camouflage, Headphones, or Similar Items
Do not wear a uniform, clothing that looks like a uniform, or camouflage clothing. Remove headphones, earbuds, and wireless hands-free devices from your ears.
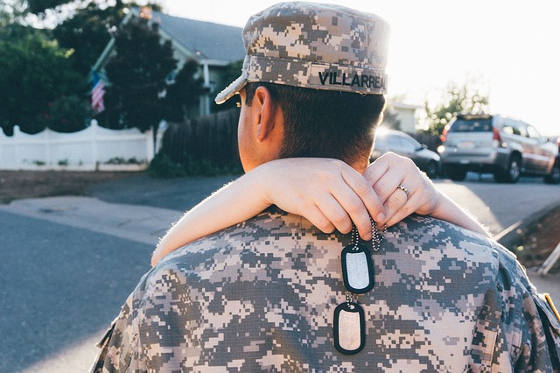
Ordinary clothing, visible logos, jewelry, and makeup are not automatically prohibited. The practical rule is that the face must be clear, the image must reproduce natural skin tones, and clothing or accessories cannot interfere with the photo.
For a focused review of attire and accessories, see what not to wear in a passport photo.
7. An Unacceptable Background
The background must be plain white or off-white. It cannot contain shadows, patterns, textures, lines, furniture, windows, decorations, other people, or visible objects.
Do not photograph someone directly against a textured wall and then try to erase or replace the background. Move to a better location, cover the wall with a plain white or off-white sheet, and take a new photo.

The background is plain, evenly lit, and free of objects.

The background contains color and visual distractions.
Passport photos for babies and young children
No other person may appear in a child’s passport photo. Place a baby on a plain white or off-white sheet, or cover a car seat with the sheet before placing the baby in it. Make sure the face is visible and free of shadows.
A baby’s eyes do not have to be entirely open. Older children must have their eyes open. Remove pacifiers, toys, hands, and anything else that blocks the face.
8. Filters, Retouching, AI, or Other Digital Changes
Submit the original, unchanged photo. Do not use editing software, phone apps, filters, or artificial intelligence to change the person or background.
Unacceptable changes include:
- Replacing, erasing, blurring, or digitally whitening the background.
- Removing blemishes, changing skin tone, or altering facial features.
- Correcting red eye with an editing tool.
- Stretching, compressing, or reshaping the image.
- Adding filters or changing color balance after the photo is taken.
- Creating or enhancing the photo with an AI tool.
Fix lighting, focus, and background problems before taking a new picture. Do not repair them afterward with software.
Online renewal is different from digital editing.
The State Department’s online renewal application allows you to reposition or crop the uploaded image. That does not permit you to replace the background, retouch the face, or otherwise change the original photo. See our online passport renewal guide for digital-photo instructions.
9. An Outdated Photo
The photo must have been taken within six months of the application and must reflect your current appearance. Do not reuse the photo from an old passport application.
Normal aging, a new hairstyle, hair color, or a beard usually does not require a replacement passport as long as you can still be identified from the photo in your current passport. A new passport may be necessary after a major appearance change, such as significant facial surgery or trauma, extensive new facial tattoos or piercings, or significant weight loss or gain.
See when a change in appearance requires a new passport photo.
How to Take a Passport Photo at Home
- Choose a plain white or off-white wall, or cover the background with a smooth white or off-white sheet.
- Stand several feet away from the background to reduce shadows.
- Have a friend or family member position the camera several feet away and level with your face.
- Use soft, even lighting from the front and check for shadows on the face and wall.
- Face the camera directly with both eyes visible and your mouth closed.
- Take several photos without filters or editing, and select the sharpest image with the most natural color.
- Crop and size the image without changing the person or background.
- For a paper application, print the final 2-by-2-inch image on matte or glossy photo-quality paper.
See how to take passport photos with a digital camera for additional setup and printing guidance.
What Happens If Your Passport Photo Is Rejected?
The State Department may place the application on hold and send a letter or email explaining what is wrong and how to submit a new photo. Follow the notice carefully and respond within 90 days so processing can continue.
- Use the mailing or email instructions in the notice you received.
- Send a new photo that corrects the specific problem identified.
- Include any notice, identifying information, or form the instructions require.
- Do not submit a second passport application unless the State Department tells you to do so.
- Expect the application to remain delayed until the replacement photo is received and reviewed.
Review the State Department’s instructions for responding to a passport letter or email.
Final Check Before You Submit
- The photo was taken within the last six months.
- The face and shoulders are centered and directed toward the camera.
- Both eyes are visible, and the mouth is closed.
- Lighting is even, and there are no shadows on the face or background.
- The background is plain white or off-white.
- The image is sharp, in color, and has not been edited or created with AI.
- No glasses, uniforms, camouflage, headphones, or unauthorized head coverings appear in the photo.
- A paper photo measures 2 inches by 2 inches and is printed on photo-quality paper.
Passport Photo FAQs
Yes. A natural smile may be accepted if both eyes are open and your mouth is closed. Avoid showing teeth, opening your mouth, tilting your head, or using an exaggerated expression.
No. Remove eyeglasses, sunglasses, and tinted glasses. If you cannot remove glasses for medical reasons, include a signed note from your doctor with the application.
Yes. Jewelry and facial piercings are allowed as long as they do not hide any part of your face or create shadows that interfere with the image.
No. Do not replace, erase, blur, or digitally alter the background. Take a new photo in front of a plain white or off-white background.
Follow the letter or email from the State Department, submit the replacement photo using the instructions provided, and respond within 90 days. Do not start a second application unless directed to do so.
A baby’s eyes do not have to be entirely open. Older children must have their eyes open, and no other person may appear in the photo.
For additional questions, visit our passport photo FAQ. You can also review other mistakes that can delay passport processing.
Our role: U.S. Passport Service Guide explains the published passport photo rules and helps applicants identify common problems before submitting an application. The U.S. Department of State makes the final decision about whether a photo is acceptable.